Vegetables
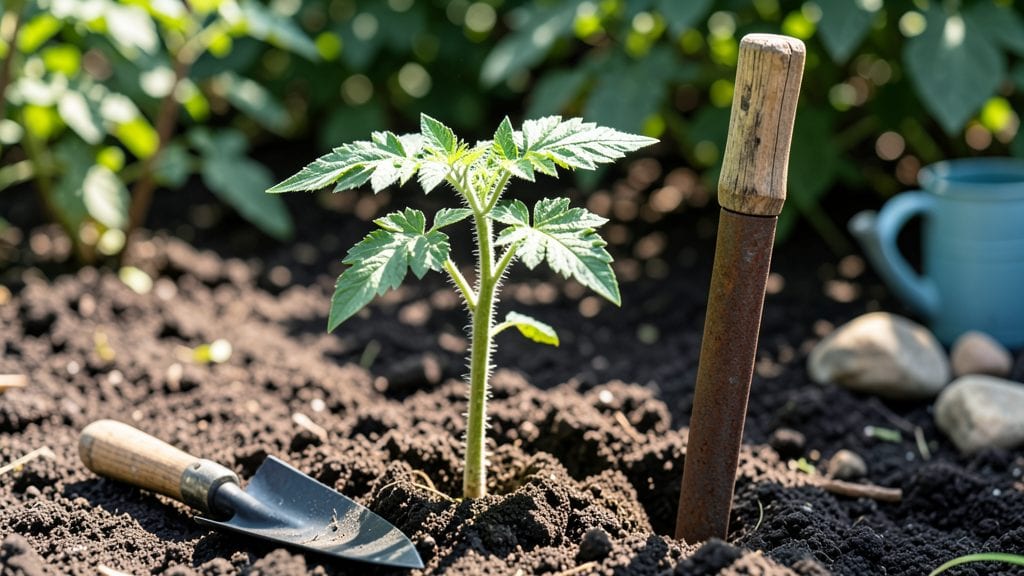
Planting tomatoes outdoors transforms your garden into a sun-drenched fruit factory once you nail the timing and technique. I learned the hard way—my first batch bolted when I planted too early, and the second year’s plants wilted under midday heat.
The right heat-resistant varieties and a few smart adjustments make all the difference, though.
Start with soil that’s warm and well-draining, at least 60°F—cold soil stunts roots, and soggy soil invites disease. Space plants 18-24 inches apart in full sun (6+ hours daily), and bury the stem deeper than the pot it came in.
This encourages stronger root growth, and mulch with straw to keep moisture steady while blocking weeds.
Within 2-3 weeks, you’ll see new leaves pushing out as roots establish, and the first flowers will appear by midseason. The key is consistency: water at the base (not overhead) and feed with compost tea every 2 weeks to prevent blossom-end rot.
Heat-resistant varieties like ‘Solar Fire’ or ‘Heatmaster’ stay productive even when temps hit 90°F.
If you’re in a short-season zone, opt for early-maturing varieties and use row covers to protect young plants from late frosts. The biggest mistake? Skipping the hardening-off process—acclimate transplants to outdoor conditions over 7-10 days before planting, or they’ll shock and stall.
Trust the process, and you’ll be snipping ripe tomatoes by summer’s end.
📚 In This Guide
- What you need
- Instructions
- Tips and common mistakes
- Wrapping up and next steps
What you need
- ● Tomato seeds or seedlings: Choose heat-resistant varieties like 'Solar Fire,' 'Heatmaster,' or 'Celebrity.' Start with 4–6 plants for a small garden.
- ● Well-draining potting mix or garden soil: 50 lbs (for containers) or amend garden beds with compost (2–3 inches) for nutrients.
- ● Containers or garden space: For containers: 5-gallon pots or larger (1 plant per container) with drainage holes.
- ● For in-ground: Full sun (6–8+ hours/day) and space 18–24 inches apart in rows.
- ● Fertilizer: Balanced, slow-release (10-10-10) or organic options like composted manure (mix 1 cup per plant into soil).
- ● Mulch: Straw or black plastic (1–2 inches thick) to retain moisture and regulate soil temp.
- ● Support system: Cages (6–8 ft tall for indeterminate varieties).
- ● Trellis or stakes (5–6 ft long) for determinate types.
- ● Watering can or hose with a gentle nozzle: 1–2 gallons per plant during dry spells.
- ● Pruning shears: For trimming suckers and dead leaves.
- ● Shade cloth: 30–50% coverage for seedlings if temps exceed 90°F.
- ● Drip irrigation kit: Automates watering and saves time.
- ● Plant food (liquid or granular): Tomato-specific fertilizer for a mid-season boost.
- ● Row covers: Protects against pests like flea beetles.
- ● Soil thermometer: Ensures roots stay in the ideal 60–70°F range.
Step-by-Step guide for planting tomatoes outdoors
Here’s the method I’ve used for years to establish healthy, heat-tolerant tomato plants that thrive from transplant to harvest.
Prepare the Soil and Planting Site
Tomatoes need well-draining, nutrient-rich soil with a pH between 6.0 and 6.8. Two weeks before planting, till the soil to a depth of 12 inches, incorporating 2-3 inches of compost and a 1/2 cup of 5-10-10 fertilizer per plant. This ensures roots have space to spread and access to essential nutrients without burning tender new growth.
Choose a location with full sun exposure—at least 6-8 hours of direct sunlight daily. If your climate is particularly hot, opt for afternoon shade to prevent sunscald on fruit. Avoid planting where tomatoes, peppers, or eggplants grew last season to prevent soil-borne diseases like verticillium or fusarium wilt.
Harden Off Seedlings Before Transplanting
If starting with nursery seedlings, harden them off for 7-10 days before planting. Begin by placing them outside in a sheltered spot for 1-2 hours the first day, gradually increasing exposure to full sun and wind over the week. This prepares the plants for outdoor conditions without shocking their systems.
Watch for wilting or yellowing leaves—these are signs the plants aren’t ready. Once seedlings tolerate a full day outside without stress, they’re ready for the garden. Transplant on an overcast day or in the late afternoon to reduce transplant shock and give roots time to establish before evening temperatures drop.
Plant Deeply for Stronger Stems
Dig a hole twice as deep as the root ball and loosen the sides to encourage root spread. Remove the seedling from its container, gently tease apart the roots if they’re circling, and place it in the hole so that 1/3 of the stem is buried. This buried section will develop additional roots, creating a stronger, more stable plant.
Fill the hole with soil, firming it gently around the base to eliminate air pockets. Water deeply to settle the soil and encourage root contact. Space plants 18-24 inches apart in rows 3-4 feet apart to allow for airflow and easy harvesting. Mulch with 2-3 inches of straw or shredded leaves to retain moisture and suppress weeds.
Provide Immediate Support and Watering
Install stakes, cages, or trellises at planting time to avoid damaging roots later. Tomatoes grow quickly, and providing support early prevents wind or fruit weight from breaking stems. Secure the main stem loosely to the stake with soft ties, leaving room for growth.
Water deeply every 2-3 days until the soil is 6 inches moist—check by inserting your finger into the soil. Avoid wetting the foliage to prevent fungal diseases like early blight. In hot climates, water in the early morning to reduce evaporation and give leaves time to dry before nightfall.
Monitor for Heat Stress and Adjust Care
Heat-resistant varieties like ‘Solar Fire’ or ‘Heatmaster’ handle temperatures up to 95°F, but extreme heat can still cause blossom drop or sunscald. If daytime temperatures exceed 90°F, provide afternoon shade with a lightweight row cover or shade cloth. Prune suckers (the shoots that form in the joint between the stem and a branch) to redirect energy to fruit production rather than foliage.
Fertilize lightly every 3-4 weeks with a balanced fertilizer (10-10-10) or compost tea to support continuous growth. Stop fertilizing 4-6 weeks before the first frost to allow fruits to mature fully. Harvest regularly to encourage more production—ripe tomatoes won’t ripen further once picked.
Tips & tricks for planting tomatoes outdoors
These practical insights will help you avoid common pitfalls and maximize your tomato plants' potential from the very first day in the ground.
Soil Preparation Insight: The two-week soil preparation window in Step 1 is non-negotiable for heat-resistant varieties. Test your soil pH before amending—if it's outside 6.0-6.8, adjust with lime (to raise) or sulfur (to lower) before adding compost. I've seen plants struggle in unamended soil even with perfect varieties like 'Heatmaster', because the root environment becomes stressed under heat. The 12-inch tilling depth creates ideal conditions for those deep roots that anchor plants during summer storms.
Harden-Off Technique: Don't rush the 7-10 day hardening process in Step 2—this is where most transplant shock occurs. I recommend setting up a portable shade structure during the final 3 days of hardening to simulate afternoon shade conditions. Watch for leaves that stay upright rather than wilting when touched; these are your indicators of readiness. Transplanting on overcast days works, but if you must plant in full sun, do it in the late afternoon when temperatures have dropped below 80°F.
Planting Depth Secret: The buried stem technique in Step 3 isn't just about strength—it's about creating a more extensive root system. When burying 1/3 of the stem, make sure you're burying actual stem tissue (not just leaves) by looking for the small nodes where leaves attach. These nodes will develop into new roots. After planting, water deeply but gently—forceful watering can dislodge the newly positioned stem section.
Heat Management Strategy: When temperatures approach 95°F as mentioned in Step 5, consider using reflective mulch like aluminum foil or white plastic around plants to deflect radiant heat. I've found that even heat-resistant varieties benefit from this when daytime temps exceed 90°F for more than 3 consecutive days. The key is maintaining that balance—you want to protect the plants without creating overly humid conditions that invite fungal diseases.
Pro Tips for Planting Tomatoes Outdoors
- These practical insights will help you avoid common pitfalls and maximize your tomato plants' potential from the very...
- Soil Preparation Insight: The two-week soil preparation window in Step 1 is non-negotiable for heat-resistant varieti...
- Harden-Off Technique: Don't rush the 7-10 day hardening process in Step 2—this is where most transplant shock occurs....
Frequently asked questions
Got questions about planting tomatoes outdoors? You’re not alone! Here are answers to the most common concerns—from timing to troubleshooting—to help you grow a thriving garden.
When is the best time to plant tomatoes outdoors?
Plant after the last frost when soil temperatures reach at least 60°F (15°C). For heat-resistant varieties, aim for mid-to-late spring (April–June in most U.S. zones). Cold soil slows growth, so wait until nighttime temps stay above 50°F (10°C).
How do I harden off tomato seedlings before planting?
Acclimate seedlings 7–10 days before transplanting by placing them outside in partial shade for a few hours daily, gradually increasing exposure. This toughens them up for full sun and outdoor conditions. Skip this step, and tender seedlings may shock and wilt!
Can I plant tomatoes in containers or just the ground?
Containers work well for determinate varieties (bush tomatoes) if they’re at least 5-gallon pots with drainage. Use a balanced fertilizer (like 10-10-10) and place pots in full sun. Ground planting gives more root space for indeterminate types (vining tomatoes).
Why are my tomato plants wilting after transplanting?
Wilt can mean transplant shock, overwatering, or root damage. Water deeply once a week (more in heatwaves) and avoid soggy soil. If leaves curl or yellow, check for blight or pests. Mulch with straw to retain moisture and reduce stress.
Do I need to prune tomato plants outdoors?
Pruning isn’t mandatory but helps improve airflow and prevent disease. For indeterminate varieties, remove suckers (side shoots) weekly. For determinate types, minimal pruning is needed—focus on removing lower leaves to prevent soil-borne issues.
| Quick Fixes for Common Issues |
|---|
| Yellow Leaves: Check for overwatering or nutrient deficiency (add compost or balanced fertilizer). |
| Blossom Drop: Ensure consistent watering and warm soil temps (70°F+). Avoid high-nitrogen fertilizers. |
| Pests (Hornworms/Aphids): Handpick pests or spray with neem oil (safe for plants). |
Wrapping up and next steps
Planting tomatoes outdoors is a rewarding journey that leads to juicy, homegrown goodness—especially when you choose heat-resistant varieties! With the right soil, spacing, and care, you’ll enjoy a bountiful harvest that puts store-bought tomatoes to shame. 🌱
Ready to take the next step? Start by sketching your garden layout or ordering seeds of your favorite heat-loving varieties like ‘Solar Fire’ or ‘Heatmaster.’ Then, roll up your sleeves and get planting—your future tomato sandwiches will thank you!