Vegetables
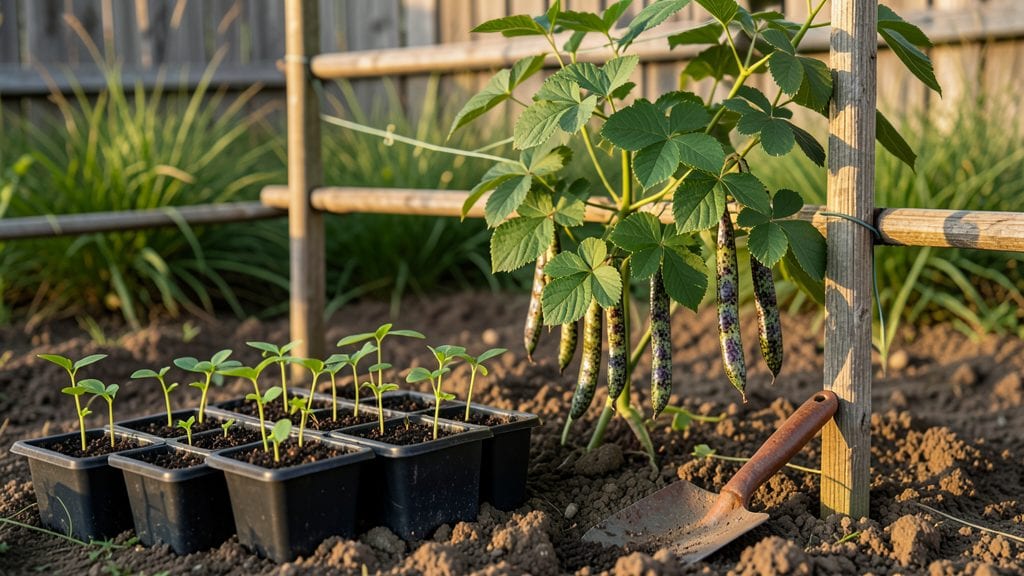
Planting rattlesnake beans transforms your garden into a dual-purpose powerhouse—lush vines that fix nitrogen in the soil while adding bold visual drama. 🌿 I learned the hard way that these aren't your average beans: they demand patience, the right soil, and a sunny spot to truly shine.
Their striking foliage and unique seed pods make them a standout in any summer garden, whether you're growing them for their soil benefits or just the pure aesthetic impact.
The secret to success starts with well-draining soil rich in organic matter—think compost mixed into the top 12 inches. Plant them after your last frost when soil temperatures hit at least 60°F, giving them a head start before summer heat arrives.
Spacing matters too: these vines need 18-24 inches between plants to sprawl without crowding, and they'll reward you with 3-6 foot vines by midsummer.
What you'll end up with is a garden that feeds itself—rattlesnake beans pull nitrogen from the air, enriching the soil for everything around them. The deep green leaves create a striking backdrop for other plants, while the seed pods add texture that lasts until frost.
Water consistently but avoid soggy soil, and watch as these vines become the backbone of your summer garden.
Perfect for borders, trellises, or even container gardens with sturdy supports. Here's how to get them thriving from seed to harvest—no green thumb required, just the right conditions.
📚 In This Guide
- What you need
- Instructions
- Tips and common mistakes
- Wrapping up and next steps
What you need
- ● Seeds: 1–2 lbs of rattlesnake bean seeds (var. Phaseolus lunatus). Choose heirloom or organic for best results.
- ● Growing Space: Direct sunlight (6–8+ hours/day) in a warm, sheltered spot.
- ● Container: 12–18" deep (if growing in pots) or well-draining soil in a garden bed.
- ● Soil: Loamy, well-draining soil with a pH of 6.0–7.0. Amend with compost if needed.
- ○ Fertilizer: Optional: Balanced organic fertilizer (5-5-5) or compost tea at planting.
- ● Garden Tools: Trowel or hand shovel for planting.
- ○ Garden gloves (optional but recommended—those vines can be tough!).
- ● Support Structures: Trellis, stakes, or cages (4–6 ft tall) for climbing varieties.
- ● Watering Can or Hose: With a gentle spray nozzle for consistent moisture.
- ● Mulch: Straw or shredded leaves to retain soil moisture and suppress weeds.
- ○ Row Cover or Netting: (Optional) To protect young plants from pests like bean beetles.
- ● Last frost date: Plant after soil temps reach 60°F+ (rattlesnake beans hate cold!).
- ● Spacing: Sow seeds 4–6" apart, with rows 18–24" apart.
- ● Patience! Germination takes 7–14 days in warm soil.
Step-by-Step guide to planting rattlesnake beans
These striking black-and-white beans thrive in warm weather and add drama to any garden.
🌱 Step 1: Choose Your Planting Location and Prepare the Soil
Rattlesnake beans love full sun—pick a spot that gets at least 6-8 hours of direct sunlight daily. I always test the soil first by squeezing a handful; if it crumbles easily, it's ready. These beans prefer well-draining soil with a pH between 6.0 and 7.0, so add compost to enrich it if needed.
Work in a 2-3 inch layer of compost into the top 6 inches of soil. This boosts fertility and helps the beans fix nitrogen naturally. Break up any clumps and rake the surface smooth—you'll see the seeds clearly when planting time comes.
🌱 Step 2: Plant Seeds at the Right Depth and Spacing
Sow seeds 1 inch deep and 4-6 inches apart in rows that are 18-24 inches apart. I like to plant them in small hills or mounds for better drainage and easier harvesting. Drop 2-3 seeds per spot—you can thin later—but don’t bury them too deep; they need light to germinate.
After planting, gently firm the soil around the seeds with your hand. This ensures good seed-to-soil contact, which speeds up germination. Water lightly to settle the soil without disturbing the seeds. You’ll see sprouts in 7-14 days if conditions are right.
💧 Step 3: Water Consistently and Support the Vines
Keep the soil evenly moist but never soggy—rattlesnake beans hate sitting in water. Water 1-2 inches per week, adjusting for rain. I check moisture by sticking my finger 1 inch into the soil**; if it feels dry, it’s time to water. Once the vines reach 6 inches tall, install trellises or stakes to support their growth.
These beans climb aggressively, so secure the supports firmly. I use 5-foot tall stakes or a strong trellis to keep the vines off the ground, which improves air circulation and reduces disease risk. Mulch around the base with 2-3 inches of straw or grass clippings to retain moisture and suppress weeds.
✂️ Step 4: Thin Seedlings and Monitor for Pests
When seedlings are 2-3 inches tall, thin them to the strongest plant per spot. Snip the weaker ones at the base with scissors to avoid disturbing the roots of the remaining plants. This gives your rattlesnake beans room to grow without competing for nutrients.
Watch for common pests like bean beetles or aphids. I inspect the undersides of leaves weekly—if you spot tiny holes or sticky residue, spray with soapy water or neem oil. These beans are tough, but early intervention prevents major damage. Harvest pods when they’re 4-6 inches long for the best flavor.
☀️ Step 5: Harvest and Extend the Season
Pick pods regularly to encourage more production. Rattlesnake beans mature quickly, so check the plants every 2-3 days once they start flowering. Harvest in the morning when pods are firm and crisp. Store them in the fridge for up to 5 days or freeze them for later use.
To extend the harvest, succession plant every 2 weeks until 6 weeks before your first frost. These beans thrive in warm weather, so avoid planting too early. With proper care, you’ll enjoy a steady supply of striking, flavorful pods all summer long.
Tips & tricks for perfect rattlesnake bean planting
A few simple strategies will help you grow these dramatic beans with confidence—and avoid common gardening pitfalls.
Soil Prep Secret: Before adding compost in Step 1, mix in a handful of crushed eggshells or wood ash to naturally raise the soil pH toward that ideal 6.0-7.0 range. I've found this helps prevent blossom end rot later, especially in slightly acidic soils. The beans will reward you with stronger vines and more pods.
Planting Precision: In Step 2, when creating those hills or mounds, make them about 6 inches high and 12 inches wide at the base. This elevation improves drainage and prevents waterlogging—critical since rattlesnake beans hate soggy roots. The extra space also makes harvesting those striking black-and-white pods much easier later.
Watering Wisdom: The 1-2 inches per week guideline in Step 3 works perfectly, but here's the pro move: water in the morning so the foliage dries completely by evening. This simple habit drastically reduces fungal diseases that love damp leaves. I've seen beans planted this way stay healthy even in humid summers.
Pest Prevention: Don't wait for pests to appear in Step 4—prevent them! Sprinkle diatomaceous earth lightly around the base of plants when they're about 4 inches tall. This non-toxic powder creates a barrier that deters bean beetles and aphids before they become a problem. I've used it for years with great success.
Pro Tips for Planting Rattlesnake Beans
- A few simple strategies will help you grow these dramatic beans with confidence—and avoid common gardening pitfalls.
- Soil Prep Secret: Before adding compost in Step 1, mix in a handful of crushed eggshells or wood ash to naturally rai...
- Planting Precision: In Step 2, when creating those hills or mounds, make them about 6 inches high and 12 inches wide ...
Frequently asked questions
Got questions about growing rattlesnake beans? You’re not alone!
Here are answers to the most common concerns—from planting to harvest—so you can grow these bold, nitrogen-rich vines with confidence.
When is the best time to plant rattlesnake beans?
Plant rattlesnake beans after the last frost when soil temperatures reach at least 60°F (15°C). In warm climates, they thrive in late spring to early summer; cooler regions may need to wait until June or July. These heat-loving vines hate cold soil, so test it first!
How long does it take for rattlesnake beans to grow and produce?
From seed to harvest, rattlesnake beans take 80–100 days—longer than many bush beans. Expect vines to climb 6–10 feet in that time, with pods forming 60–80 days after planting. Patience pays off: Their large, speckled pods are worth the wait!
Can I grow rattlesnake beans in containers or small spaces?
Yes! These vines thrive in 5-gallon containers or trellises as long as they get 6+ hours of sun and deep soil. Use a support structure (like a teepee or cage) to save space. Just ensure drainage is excellent—they hate soggy roots.
What pests or diseases should I watch for with rattlesnake beans?
Common threats include bean beetles, aphids, and powdery mildew. Prevent issues by:
- Rotate crops (avoid planting in the same spot yearly).
- Use row covers early to block pests.
- Prune lower leaves for airflow (reduces mildew).
Are rattlesnake beans spicy or hot like chili peppers?
Nope! Despite their name, rattlesnake beans are mild and nutty—not spicy. Their bold, speckled pods add visual drama to gardens, while their high protein and fiber make them a great culinary (and nitrogen-fixing!) addition. Perfect for stews, soups, or fresh eating!
Wrapping up and next steps
Planting rattlesnake beans is a rewarding adventure for gardeners craving bold flavors and nitrogen-rich soil—plus, they’re a stunning addition to any summer landscape! 🌱 With their striking foliage and delicious pods, these beans prove that growing can be both practical and visually exciting. Ready to dive in?
Your next step? Mark your calendar for the ideal planting window (spring or post-last-frost) and gather your supplies. Whether you’re a seasoned gardener or a curious beginner, rattlesnake beans offer a fun, low-maintenance way to boost your harvest—and your garden’s health. Happy planting! 🌟