How To
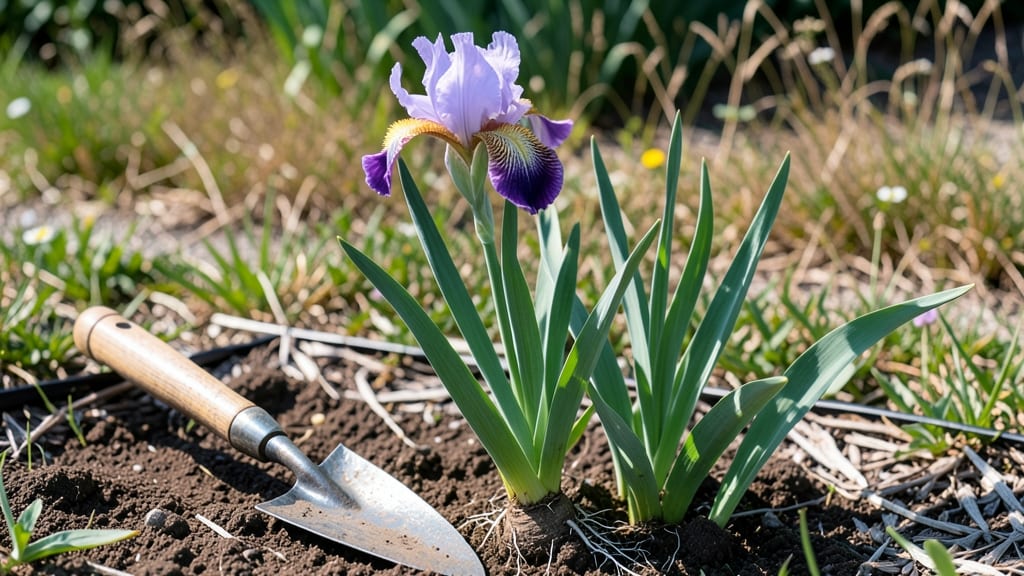
Planting iris tubers transforms your garden into a riot of spring color—those bold, velvety blooms appear like clockwork if you get the timing and depth right. I’ve planted irises for years, and the difference between a thriving clump and a struggling one comes down to just a few key moves.
The secret isn’t complicated: it’s about matching the tuber’s natural needs with your soil and climate.
You’ll need a sunny spot with well-draining soil (irises hate soggy feet), some sharp sand or grit for mixing, and a simple hand trowel.
The best time to plant is in early fall, but spring works too if you act fast—just get those tubers in the ground before the heat sets in. Most gardeners overlook drainage, which is why so many irises fail: the roots need air as much as water.
By following the 5 simple steps, you’ll end up with clumps that multiply year after year, sending up sword-like foliage in spring and blooms that last for weeks. The flowers come in every shade from deep purple to sunny yellow, and they attract pollinators like crazy.
Once established, irises need almost no maintenance—just divide the clumps every 3-4 years to keep them vigorous.
This method works for both bearded and beardless varieties, whether you’re planting in a sunny border, along a driveway, or even in containers. The payoff? A garden that wakes up in spring with color you’ll brag about to neighbors. Let’s get those tubers in the ground!
📚 In This Guide
- What you need
- Instructions
- Tips and common mistakes
- Wrapping up and next steps
What you need
- ● Iris tubers: Healthy, firm rhizomes (tubers) with at least one eye (growth bud) per tuber. Buy from a trusted nursery or dig up mature clumps from existing plants.
- ● Well-draining soil: Mix garden soil with sand or perlite (ratio: 2 parts soil to 1 part amendment) to prevent rot.
- ● Garden fork or trowel: For digging trenches (6–8 inches deep) and planting.
- ● Compost or organic fertilizer: A balanced, low-nitrogen option (e.g., 5-10-10) to nourish roots without promoting leafy growth over blooms.
- ○ Mulch (optional but recommended): Straw or pine bark (2–3 inches thick) to retain moisture and regulate soil temp.
- ● Gloves: Protect your hands from thorns and soil.
- ● Hose with gentle spray nozzle: For watering without disturbing tubers.
- ● Measuring tape or ruler: Ensure tubers are planted at the correct depth (top should peek above soil).
- ● Plant marker flags: Label varieties if growing multiple types.
- ○ Fungicide (optional): A copper-based treatment to prevent rot in damp climates.
- ○ Sunlight meter (optional): Verify your garden gets 6+ hours of full sun daily.
Step-by-Step instructions for planting iris tubers
Here’s how to plant iris tubers for vibrant, long-lasting blooms with minimal fuss.
Prepare Your Planting Site
Choose a location with full sun—irises thrive with at least 6 hours of direct sunlight daily. Dig a trench 6-8 inches deep and 12 inches wide, since iris tubers grow rhizomes that spread horizontally. The soil should drain well, so avoid low spots where water pools. If your soil is heavy clay, mix in 2-3 inches of coarse sand or perlite to improve drainage.
Loosen the soil to a depth of 12 inches with a garden fork, breaking up any compacted layers. This encourages strong root growth and prevents rot. Work in a 1-inch layer of compost into the bottom of the trench to provide nutrients without smothering the tubers. Irises hate soggy soil, so if your yard drains poorly, consider planting them on a mound instead.
Inspect and Position the Tubers
Examine each tuber for firm, plump sections—these are the parts that will sprout. The top of the tuber (where the fan of leaves emerges) should be slightly raised, while the bottom (where roots form) is flatter. If the tuber feels soft or mushy, it may be rotting and should be discarded. Healthy tubers have a slightly papery texture and no signs of mold.
Place the tubers in the trench with the raised side facing up and the flat side down. Space them 12-18 inches apart in rows 24 inches apart to allow room for growth. If you’re planting in a border, stagger the tubers in a herringbone pattern for a more natural look. Press them lightly into the soil—just enough to keep them stable, but don’t bury them deeply.
Cover and Water Gently
Backfill the trench with soil, leaving the top third of each tuber exposed. This ensures the rhizomes stay dry and prevents rot. The exposed portion should look like it’s peeking out of the soil, not buried. Once planted, water deeply but sparingly—irises prefer dry conditions once established. Aim for 1 inch of water per week, delivered either through rainfall or irrigation.
After watering, avoid disturbing the soil around the tubers. Irises establish slowly, and too much movement can damage emerging roots. If your climate is particularly dry, mulch lightly with 1 inch of straw or shredded leaves, keeping it 6 inches away from the tubers to prevent moisture buildup. This helps retain soil moisture without suffocating the plants.
Monitor and Encourage Growth
In 4-6 weeks, you’ll see new shoots emerging from the top of the tubers. These are the first signs of life, and they’ll grow quickly once established. Avoid fertilizing in the first year—irises are slow to wake up and can be damaged by overfeeding. Instead, let them focus on root development. If weeds begin to compete, hand-pull them carefully to avoid disturbing the tubers.
By late summer, the leaves will yellow and die back naturally. This is normal and signals the plant is entering dormancy. At this point, reduce watering to once every 2-3 weeks unless your area experiences extreme drought. The rhizomes will store energy for next year’s blooms, so resist the urge to trim the foliage early—let it stay until it turns brown on its own.
Divide and Maintain for Long-Term Blooms
After 3-4 years, iris tubers will multiply and crowd each other, leading to fewer blooms. In early spring or fall, dig up the clumps and separate the rhizomes with a sharp knife or garden fork. Each section should have at least one fan of leaves and a healthy-looking tuber. Discard any that are soft, shriveled, or diseased. Replant the best sections immediately in the same way you did initially.
To keep your irises thriving, divide them every 3-4 years and replace old tubers with new ones every 5-6 years. This prevents overcrowding and ensures strong, vibrant blooms. After dividing, water lightly for the first 2 weeks to help the roots re-establish. With proper care, your iris bed will reward you with stunning spring blooms for decades.
Tips & tricks for perfect iris planting
A few simple strategies will help you grow the healthiest iris garden with minimal effort.
Soil Prep is Everything: In Step 1, when you're loosening the soil to 12 inches deep, take an extra moment to break up any compacted layers completely. I've seen irises struggle when roots can't penetrate through hard soil—this step makes all the difference. If your soil is particularly dense, consider adding an extra inch of compost to the bottom of the trench beyond what's specified. The goal is to create an environment where roots can spread freely without resistance.
Tuber Orientation Matters: When positioning your tubers in Step 2, pay close attention to the natural shape. The raised side should be clearly visible above the soil line—this is where the leaves will emerge. I've planted tubers with the wrong orientation before, and while they might still grow, they often produce fewer blooms. Think of it like planting potatoes: the "eyes" (or in this case, the raised side) should face upward.
Watering Wisdom: The instructions mention watering deeply but sparingly, but here's the key detail nobody tells you: irises actually prefer to be on the drier side once established. In Step 3, after your initial watering, let the soil dry out completely between waterings. You'll know you're doing it right when the top inch of soil feels dry to the touch. Overwatering is the #1 reason irises fail—don't let the soil stay soggy for more than a day or two.
Dividing Made Easy: When it comes time to divide your irises in Step 5, I recommend doing this in early fall rather than spring. The cooler temperatures mean less stress on the plants, and they'll have time to establish roots before winter. Use a sharp knife to cleanly separate the rhizomes—don't tear them. Each new section should have at least one healthy fan of leaves and a good-sized tuber. This simple technique ensures your new plantings will thrive from day one.
Pro Tips for Planting Iris Tubers
- A few simple strategies will help you grow the healthiest iris garden with minimal effort.
- Soil Prep is Everything: In Step 1, when you're loosening the soil to 12 inches deep, take an extra moment to break u...
- Tuber Orientation Matters: When positioning your tubers in Step 2, pay close attention to the natural shape. The rais...
Frequently asked questions
Got questions about planting iris tubers? You’re not alone! Here are answers to the most common concerns—from timing to troubleshooting—to help you grow a stunning iris garden with confidence.
When is the best time to plant iris tubers?
Plant iris tubers in early fall (6-8 weeks before the first frost) or late winter/early spring (as soon as the ground is workable). Fall planting gives roots time to establish before winter, while spring planting works in warmer climates. Avoid planting when the soil is frozen or waterlogged for best results.
Can I plant iris tubers in winter?
Yes, but only in mild-winter zones (USDA Zones 7-10). In colder regions, wait until spring. If planting in winter, cover tubers with mulch (3-4 inches) to protect them from freezing. Avoid planting when soil is frozen or soggy—wait for temperatures above 40°F (4°C) and dry conditions.
How deep and how far apart should I plant iris tubers?
Dig a hole 3-4 inches deep (with the top of the tuber slightly above soil level) and space tubers 12-24 inches apart (closer for dwarf varieties, farther for tall bearded irises). Plant rhizomes horizontally, not vertically, with the pointy end facing upward for optimal growth.
Why aren’t my iris tubers blooming?
Common reasons include overcrowding (divide clumps every 3-4 years), poor sunlight (irises need 6+ hours of direct sun), or over-fertilizing (use a low-nitrogen, high-phosphorus fertilizer in early spring). Also, cut back foliage after blooms fade but leave 1/3 of the leaves to feed the rhizome.
What can I plant near irises to improve their growth?
Pair irises with companion plants that thrive in similar conditions, like:
- Catmint (deters pests and attracts pollinators)
- Salvia (adds color and repels slugs)
- Ornamental grasses (like fountain grass for texture)
- Daylilies (tolerates iris’s dry soil preferences)
Wrapping up and next steps
Planting iris tubers is a rewarding way to welcome vibrant blooms into your garden—whether you're a seasoned gardener or just starting out! 🌸 With the right timing, soil prep, and care, you’ll enjoy stunning flowers year after year. Now that you’re equipped with the know-how, grab those tubers and get planting! Ready for the next step? Consider adding mulch or companion plants to protect your irises and enhance their beauty.
Pro tip: Keep an eye on your irises as they grow—adjusting care based on their progress will ensure they thrive for seasons to come! 🌱