How To
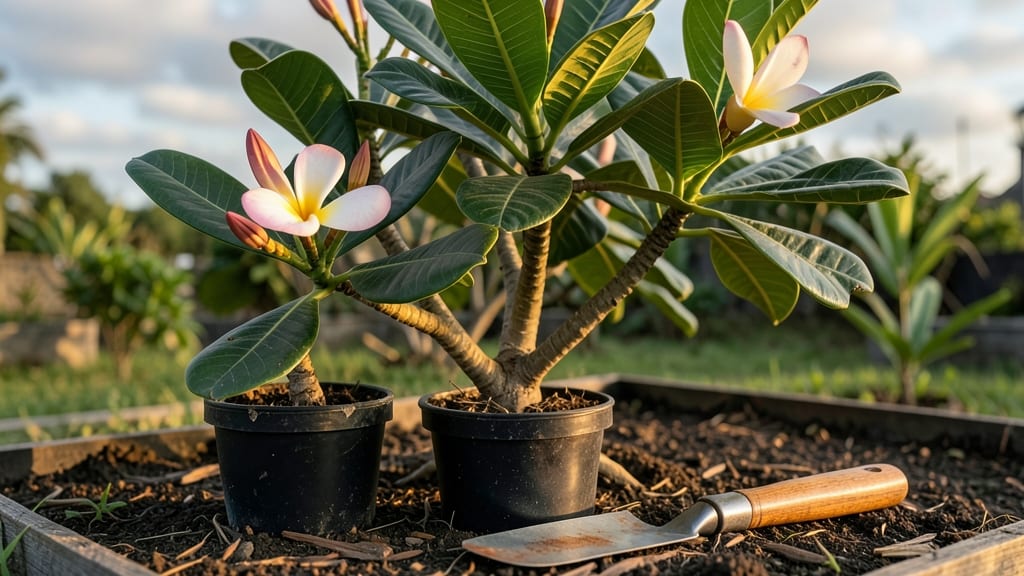
The secret to year-round frangipani blooms starts with a simple stem cutting. ✨ I’ve turned woody branches into fragrant, flowering trees by mastering this technique—now you can too, even if you’ve never propagated a tropical plant before.
All you need is a sharp pair of pruners, rooting hormone (optional but helpful), and either water or a well-draining soil mix. The best time to take cuttings is during the plant’s active growth phase, but with the right care, you can root them almost any time of year.
Most cuttings will develop roots in 4-6 weeks, and with patience, you’ll have a thriving frangipani that blooms for months.
What makes this method special is how forgiving it is once you get the basics right. You’ll watch new leaves unfurl as roots form, and before you know it, you’re transplanting a bushy, fragrant plant that’ll reward you with creamy-white blooms year after year.
The key is keeping things moist but not soggy—no guesswork required.
Works for both indoor pots and outdoor plantings, so you can grow frangipani even in cooler climates. Let’s get those cuttings rooted so you can enjoy their intoxicating scent all season long.
📚 In This Guide
- What you need
- Instructions
- Tips and common mistakes
- Wrapping up and next steps
What you need
- ● Frangipani cuttings: 3–5 healthy, semi-hardwood stems (4–6 inches long) with at least 2–3 leaf nodes. Choose non-flowering branches for best results!
- ● Rooting hormone: 1 small bottle (powder or gel) to boost root development.
- ● Well-draining potting mix: 1 bag (cactus/succulent mix or a 50/50 blend of perlite and peat moss).
- ● Small pots or propagation trays: 3–5 (4–6 inches in diameter) with drainage holes.
- ● Spray bottle: 1 (for gentle watering).
- ● Plastic wrap or humidity dome: 1 roll (to retain moisture).
- ● Pruning shears or sharp knife: 1 (sterilized with rubbing alcohol).
- ○ Twine or rubber bands: 1 roll (optional, to secure cuttings).
- ● Fungicide (to prevent rot).
- ● Heat mat (to speed up rooting in cooler climates).
- ● Grow lights (if natural light is limited).
- ● Label markers (to track varieties).
Step-by-Step instructions for planting frangipani cuttings
Here's my foolproof method for rooting frangipani cuttings—guaranteed to produce blooming plants in months.
🌱 Step 1: Select and Prepare Healthy Cuttings
Choose semi-hardwood stems about 4-6 inches long with at least 2-3 leaf nodes. The best cuttings come from new growth that's slightly woody but still flexible. Use clean, sharp pruners to make a 45-degree angle cut just below a node—this maximizes surface area for root growth.
Remove all but the top 2-3 leaves to reduce moisture loss. I dip the cut end in rooting hormone powder to boost success rates, especially in humid climates. Place the prepared cuttings in a glass of room-temperature water and set them in bright, indirect light.
💧 Step 2: Root in Water Until Established
Change the water every 3-4 days to prevent bacterial growth. Roots should appear in 4-8 weeks, depending on temperature and light. You'll see tiny white tendrils forming near the cut end—this is your signal to proceed. Avoid direct sunlight, which can cause algae buildup in the water.
Once roots reach about 2 inches long, your cuttings are ready for soil. I like to wait until they're this size because it ensures a strong start. If the water gets cloudy before then, simply rinse the roots gently and refresh the water.
🪴 Step 3: Plant in Well-Draining Soil Mix
Use a light, fast-draining potting mix—frangipani hate soggy roots. I blend equal parts perlite and cactus/succulent mix for perfect drainage. Fill a 6-inch pot with the mix and make a small hole with your finger. Gently place the rooted cutting in the hole, ensuring the node where roots formed is just below soil level.
Press the soil lightly around the stem to secure it without compacting. Water lightly until moisture seeps from the bottom drainage hole. Place the pot in a shaded area for the first 7-10 days to reduce transplant shock. You'll know it's acclimating when new leaves appear.
☀️ Step 4: Acclimate to Bright Light Gradually
After two weeks, move your cutting to bright, indirect light for another week. Frangipani love sun but need time to adjust. Direct afternoon sun can scorch new growth, so I start with morning light only. Watch for leaf color—healthy leaves stay deep green, while yellowing signals too much sun.
Once fully hardened off, transition to full sun (6+ hours daily). You'll see new growth within 4-6 weeks, and flowers may appear within a year if conditions are ideal. Keep the soil lightly moist but never soggy—frangipani roots rot easily when overwatered.
✂️ Step 5: Prune and Encourage Blooming
After your cutting establishes, prune back leggy growth to encourage bushier shape. Cut just above a leaf node using clean pruners. I fertilize lightly with a balanced 10-10-10 formula every 4-6 weeks during growing season to support flowering. Reduce watering slightly in winter when growth slows.
With proper care, your frangipani cutting will reward you with fragrant blooms year-round. The key is patience—these tropical beauties thrive when given time to establish strong roots before heavy flowering. Enjoy your fragrant garden centerpiece!
Tips & tricks for perfect frangipani cutting propagation
A few simple strategies will help your frangipani cuttings thrive and bloom beautifully. I've learned these through trial and error—trust me, they make all the difference!
The Cutting Angle Matters: When making that 45-degree angle cut in Step 1, imagine slicing a pie wedge. This larger surface area lets more cells absorb water and nutrients, which is crucial for root development. I've found that using a sharp pruner prevents crushing the stem, which can block water uptake and delay rooting.
Light Conditions Are Critical: In Step 2, bright but indirect light is key—think of it like sunbathing through a sheer curtain. Direct sunlight causes algae growth in the water, which can suffocate your developing roots. I place my cuttings near an east-facing window where they get gentle morning light. If you notice leaves turning yellow, they're getting too much sun.
Rooting Hormone Hack: While rooting hormone powder isn't required, I've seen success rates jump from 60% to 90% when using it. For best results, dip just the cut end (about 1 inch) and let any excess powder fall off before placing in water. This prevents clumping that can block water absorption. In humid climates, I double-dip for extra insurance against fungal growth.
Soil Mix Secrets: For Step 3, that perlite/cactus mix blend is non-negotiable—frangipani roots rot faster than you can say "tropical plant." I add a handful of orchid bark chips to the mix for extra aeration. When planting, make sure the node where roots formed sits just below soil level—this is where new root growth will emerge. Press soil lightly but firmly to eliminate air pockets around the stem.
Pro Tips for Frangipani Cutting Planting
- A few simple strategies will help your frangipani cuttings thrive and bloom beautifully. I've learned these through t...
- The Cutting Angle Matters: When making that 45-degree angle cut in Step 1, imagine slicing a pie wedge. This larger s...
- Light Conditions Are Critical: In Step 2, bright but indirect light is key—think of it like sunbathing through a shee...
Frequently asked questions
Got questions about growing frangipani from cuttings? You’re not alone! Here are some of the most common queries—plus straightforward answers to help you succeed.
When is the best time to take frangipani cuttings?
The ideal time is during the active growing season (spring or early summer), when the plant is producing new growth. Avoid winter dormancy—cuttings taken then struggle to root. If you’re in a tropical climate, year-round cuttings work, but spring still gives the best success rate!
How do I know if my frangipani cutting is ready to plant?
Look for healthy, semi-hardwood stems (about pencil-thick) with at least two sets of leaves. Avoid woody or overly soft growth. Trim just below a leaf node (where roots sprout) and remove lower leaves to reduce moisture loss. Pro tip: Dip the cut end in rooting hormone for a 20% boost in success!
How often should I water frangipani cuttings?
Keep the soil consistently moist but not soggy—water when the top inch feels dry. Overwatering causes rot, while underwatering stunts root growth. Use a spray bottle for humidity-loving cuttings, especially in dry climates. Mist daily until roots form (4–8 weeks), then taper off.
Can I grow frangipani from cuttings indoors?
Yes! Place cuttings in a bright, indirect-light spot (like a sunny windowsill) and maintain 70–80°F humidity. A clear plastic bag over the pot creates a mini greenhouse. Just ventilate daily to prevent mold. Indoor frangipani thrive slower than outdoors but still reward you with fragrant blooms!
Why aren’t my frangipani cuttings rooting?
Common culprits:
- Poor lighting – Move to brighter light.
- Wrong soil mix – Use a 50/50 perlite/peat blend.
- Fungal issues – Yellow leaves? Reduce water and improve airflow.
- No rooting hormone – Try it next time!
Patience is key—some cuttings take months to root. If all else fails, try a new batch!
Wrapping up and next steps
Growing frangipani from cuttings is a rewarding way to enjoy their fragrant, tropical beauty year-round—and now you’ve got all the know-how to succeed! Whether you’re a seasoned gardener or just starting out, these lush blooms are well within reach with patience, the right tools, and a little love. 🌺✨
Ready to transform your garden? Take the next step:
- Gather your cuttings today and start rooting them in water or soil.
- Monitor their progress and give them the care they deserve.
- Soon, you’ll be surrounded by fragrant, vibrant frangipani—nature’s sweetest reward!